Record your screen
Borumi lets you record your screen in different ways. In this guide, we’ll discuss each option and when to choose it.
Turn on screen recording
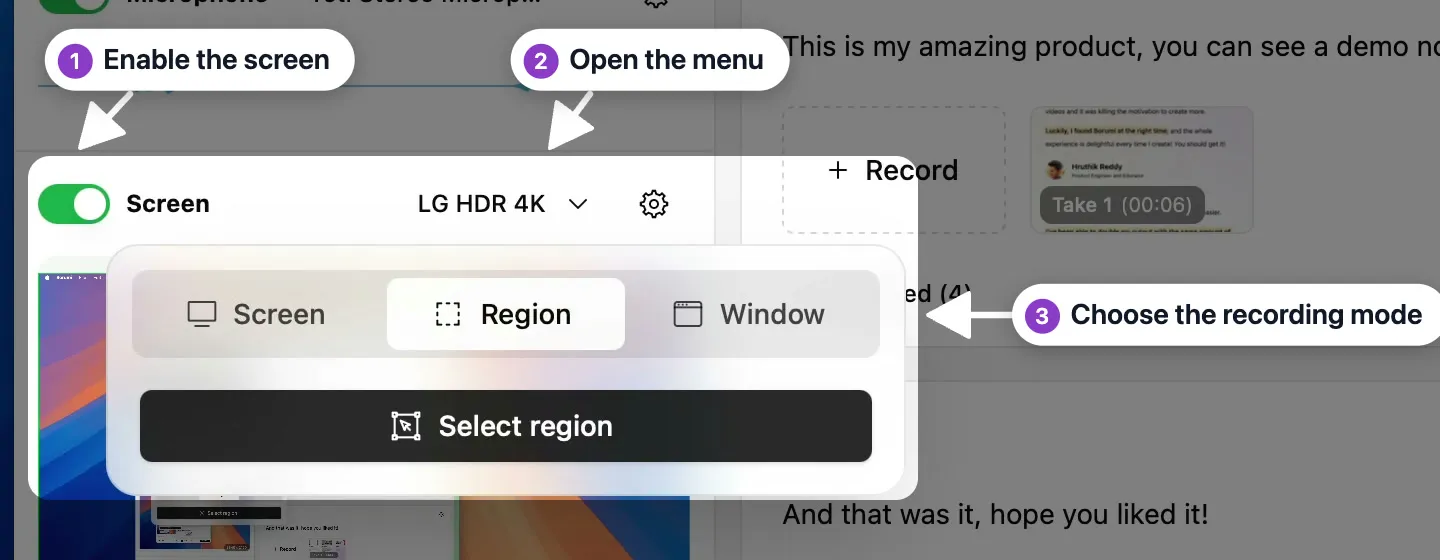
Section titled “Turn on screen recording”In the Record tool, turn on Screen and choose what to record:
Choose what to record
Section titled “Choose what to record”The menu has three tabs, one for each way of recording your screen:
Screen
Section titled “Screen”Records everything on one display. Choose it when you move between several apps, or when you’re not sure what you’ll show. If you have more than one display, pick the one you want.
Region
Section titled “Region”Records only part of your screen. Choose it to keep the focus on one area and leave the rest of your desktop out.
Click Select region, drag over the area you want, then click OK.
Window
Section titled “Window”Records a single app window. Choose it when you only want to show one app.
Smoother screen recordings
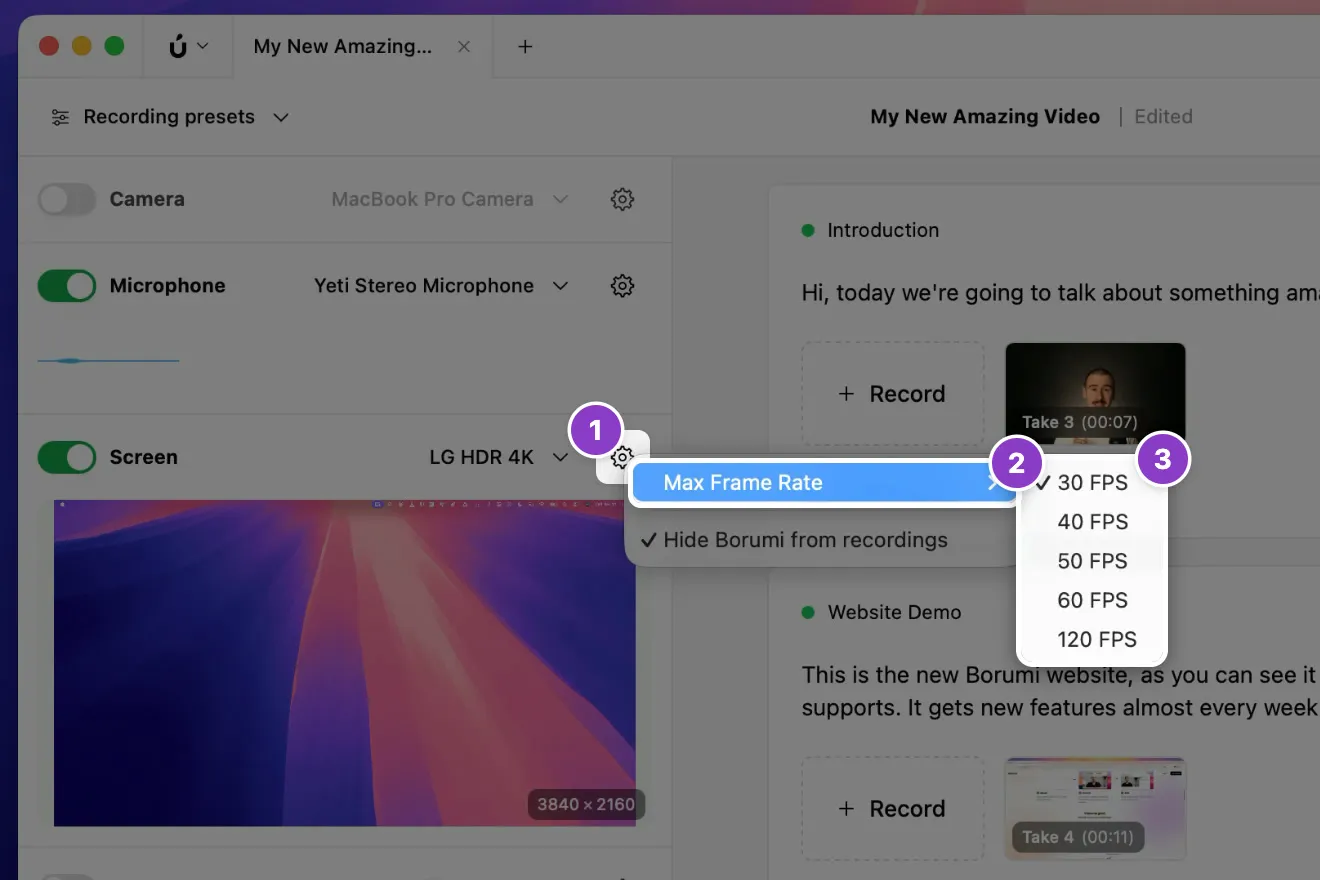
Section titled “Smoother screen recordings”By default, Borumi records your screen at 30 frames per second, which works well for most tutorials. For the smoothest motion, for example in fast demos or games, you can increase the frame rate:
- Click the gear next to Screen.
- Choose Max Frame Rate.
- Pick a higher frame rate, like 60 FPS.